Как (и где) установить экшн-камеру (на что угодно!)
Фото и видео с экшн-камеры могут быть потрясающими. Но как сделать лучшие кадры? Все дело в установке камеры, и мы расскажем вам, как это сделать.
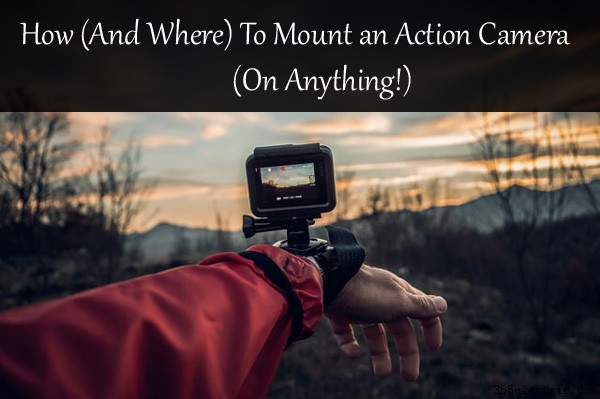
Как и куда крепить экшн-камеру? Самое популярное место для крепления экшн-камеры — шлем с изогнутым креплением. . Тем не менее, вы можете установить камеру практически на все, что движется. Читайте дальше, чтобы узнать, как это сделать. Существуют разные крепления для разных вариантов размещения камеры. На рынке представлено множество уникальных маунтов. Вы также можете сделать крепления своими руками. Вам понадобится крепление и, возможно, не одно. Мы рассмотрим некоторые из многих креплений, которые вы можете использовать с вашей экшн-камерой.
Как:руководство
Крепления, прилагаемые к вашей экшн-камере, хороши тем, что вы можете использовать их практически на чем угодно. Обычно у вас есть изогнутое и плоское крепление с вашей камерой, а также монтажная пряжка и монтажная рамка. Рекомендуется приобрести их побольше, чтобы использовать их на разных поверхностях. Чтобы отсоединить их, достаточно нанести фен или тепловую пушку на клей, удерживающий крепление на месте.
Вот как установить экшн-камеру на различные поверхности, в том числе:
Крепление для шлема
Крепление для скейтборда
Крепление для доски для серфинга
Маунт для футбольных ворот
Автомобильное крепление
Крепление для квадроцикла/лодки
Крепление на запястье
Крепление для лески
Крепление для собаки
Скакун с мечом
Что делать, если у вашей экшн-камеры другой тип крепления?
GoPro использует тип крепления с прорезями и боковым винтом. Многие производители экшн-камер используют одно и то же крепление на своих камерах, чтобы иметь возможность использовать одни и те же аксессуары. Однако, если ваша экшн-камера использует другой тип крепления, например вертикальный винт, вот что вам нужно, чтобы адаптировать все перечисленные выше крепления к этому типу.
Маунты
1. Крепление для шлема
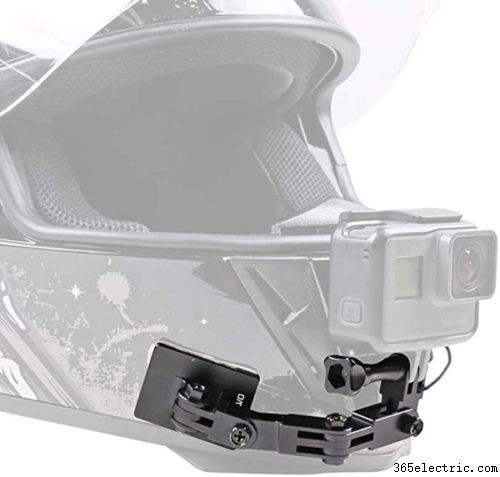
Это самое простое и популярное крепление. Используя изогнутое или плоское крепление, в зависимости от того, где вы хотите разместить камеру, просто прикрепите основание крепления к шлему. Подождите 24 часа, и вы готовы к работе.
Мы предпочитаем крепление на подбородке для камеры шлема. Вот инструкции, как это сделать:
- Очистите и высушите шлем перед установкой крепления. Вам нужно, чтобы клей приклеился к чистой поверхности.
- Удалите клей с изогнутого держателя.
- Поместите изогнутое крепление ниже отверстий для рта на шлеме. Плотно прижмите крепление, чтобы клей приклеился.
- Заклейте крепление лентой. Это поможет правильно закрепить крепление и сохранить его на месте, пока оно сохнет.
- Подождите 24 часа, чтобы убедиться, что он высох.
- Снимите ленту.
- Поместите разъем (должен поставляться) на крепление с помощью винта, прилагаемого к камере.
- Прикрепите камеру к разъему с помощью другого винта.
- Вы должны иметь возможность немного двигать камеру, чтобы снимать под нужным углом.
- Снимите отличное видео.
Мы обнаружили, что процесс крепления на подбородке лучше всего подходит для экшн-камеры, но вы можете разместить ее буквально в любом месте шлема. Используйте плоское крепление, если вы хотите, чтобы камера располагалась сбоку шлема, и изогнутое крепление, если вы хотите, чтобы камера располагалась сверху шлема.
Чтобы купить этот тип крепления, нажмите здесь.
2. Крепление для скейтборда
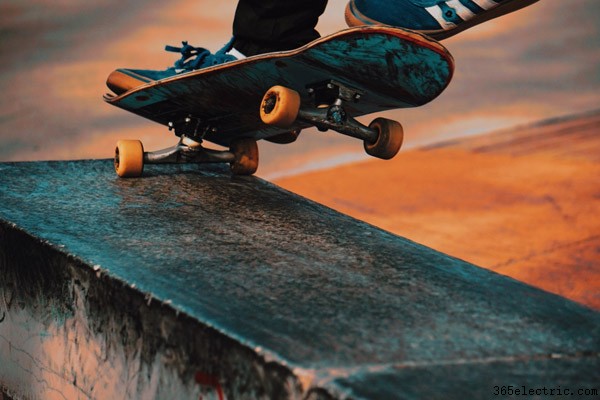
На скейтборде можно получить отличные кадры и кадры. С экшн-камерой вы можете закрепить камеру на шлеме или запястье, чтобы делать снимки в движении, но что, если вы хотите, чтобы камера была на самом скейтборде? Это может быть фантастической точкой зрения для камеры. Не волнуйся. У нас есть для вас:
- Очистите и высушите область скейтборда, прежде чем надевать крепление.
- Удалите клей с плоского держателя.
- С помощью плоского крепления прикрепите его к нижней части скейтборда.
- Заклейте крепление скотчем и подождите 24 часа, чтобы убедиться, что оно прочно приклеилось к скейтборду.
- Удалите ленту.
- Прикрепите камеру к креплению.
- Используя больше ленты, обмотайте ее вокруг скейтборда и камеры, чтобы еще больше закрепить камеру.
- Убедитесь, что лента не закрывает видоискатель камеры.
Чтобы купить этот тип маунта, нажмите здесь.
Вот еще один тип крепления для скейтборда.
3. Крепление для доски для серфинга
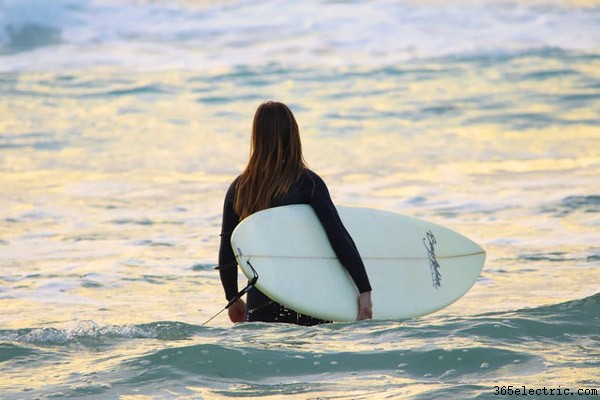
Для этого крепления вам понадобится:
- Жидкость на спиртовой основе
- Чистящие салфетки
- Плоское крепление
- Крепление Tether
- Стропа
- Запирающая заглушка
- Винт с накатанной головкой
Это довольно простое крепление. Все, что вам нужно сделать, это:
- Удалите воск с доски и очистите поверхность жидкостью на спиртовой основе.
- Тщательно высушите область.
- Удалите подложку с клейкой стороны крепления.
- Прикрепите крепление к доске. Убедитесь, что он прямой, и немного надавите.
- Удалите клейкую подложку с крепежного троса.
- Поместите часть троса в изгиб основного крепления. Приложите немного давления.
- Проденьте веревку привязи через часть привязи и обратно через петлю. Затяните.
- Вставьте крепление для экшн-камеры.
- Вставьте фиксирующую заглушку в отверстие в креплении для экшн-камеры.
- Проденьте шнурок через корпус экшн-камеры.
- Вставьте винт с накатанной головкой через отверстие в стопорной заглушке.
- Оставьте на 24 часа.
- Прибой!
Чтобы купить этот тип маунта, нажмите здесь.
4. Маунт для футбольных ворот
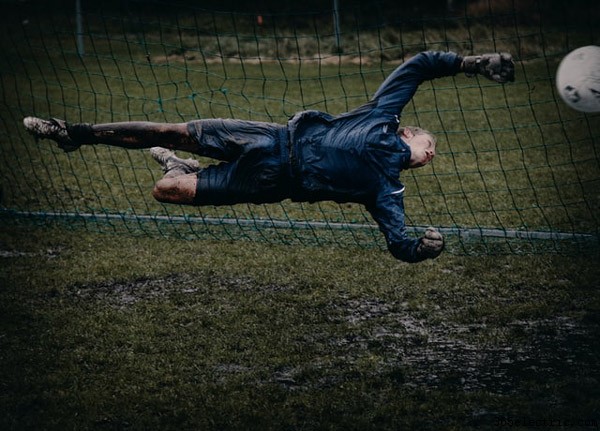
Вы когда-нибудь видели профессиональный футбольный матч по телевизору? You know those goals where they show the ball going into the net and you are given a great view from the back of the net? Well, we’re going to show you how to achieve that with your action camera. For this, you will need a chest strap mount.
Stretch the strap on the chest mount to the back of the net.
Make sure you stretch the strap as tautly as you can across the net. This will help ensure stability for the camera.
You are going to want to check the angle of your camera to make sure you get the best view of the entire net.
To buy this type of mount click here.
5. Car Mount
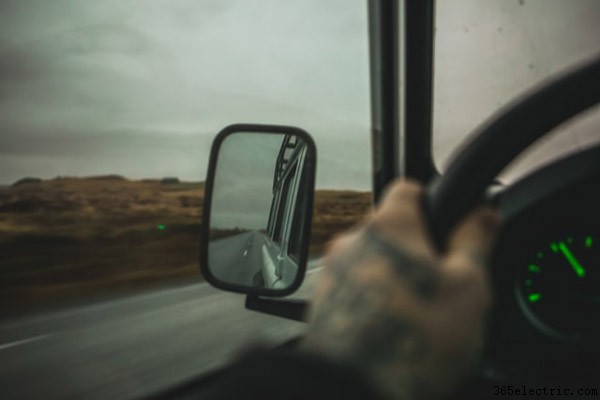
There are many different places to mount an action camera inside of your car. It really depends on what you want to pick up with your camera. For car mounting, we recommend using the suction cup mounting. You can also use a couple of extender bars to increase the angle of the camera. It’s stable and adheres well to the windshield or other areas of the car.
- As always, make sure the area where you will place the camera is clean and dry. An alcohol-based liquid and a clean rag will take care of this.
- To get the driver’s view on the camera, place the suction mount in the middle of the windshield below the rearview mirror.
- You may want to dampen the suction cup before placing it on the windshield, which will help the mount stick.
- To see where you’re going AND where you’ve been, place the suction mount on the passenger side window. Position it so that the camera will pick up both the sideview mirror as well as the view out of the passenger side seat.
- If you have a sunroof, try mounting the suction cup on the inside of the sunroof. With this, you can get a shot of the road as well as your dashboard. For this, you will also need some extender bars.
To buy this type of mount click here.
6. ATV/Boat Mount
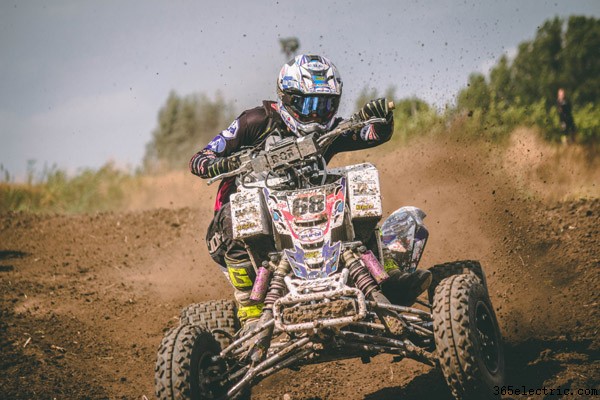
For a tires-eye view of the terrain, you can use a roll bar mount to put your camera directly on the lower part of an ATV grill or winch. The roll bar mount makes this very easy. To attach the roll bar mount, just follow these instructions:
- Unscrew both thumbnuts until the clamp is at a large enough diameter to fit the intended tubing.
- Remove bolt and thumbnut together from one open side.
- Place the clamp on your intended mounting location.
- Tighten both thumbnuts until clamp is secure.
- To mount the camera directly to the clamp, use one of the included pivot bars.
- Adjust your camera to your preferred angle.
- Tighten all mounting hardware so the camera is secure
There are many places you can place your roll bar mount besides an ATV. You can put it on dune buggy roll bars or boats, as well. Really, anywhere there is a round bar, and you want to take some video or photos, you can use the roll bar mount and an action camera to get the shot you need.
To buy this type of mount click here.
7. Wrist Mount
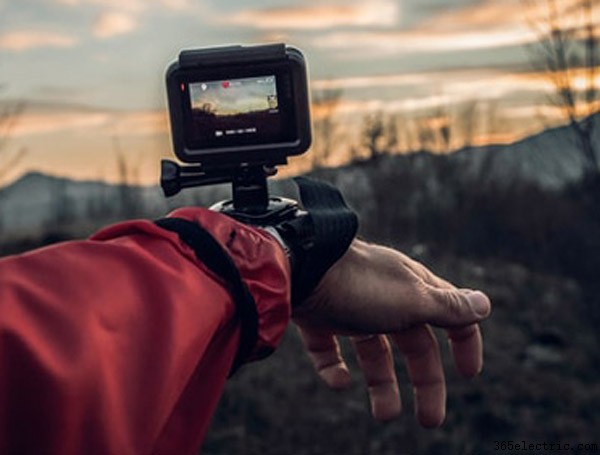
The wrist mount is a separate accessory for action cameras but you can use it to create some really great, hands-free shots. This is especially good for underwater activities such as scuba diving or snorkeling, as it is waterproof.
The strap on the wrist mount is adjustable so you can use it on different body parts besides the wrist. Use it on your arm or leg as well, if you want shots from that angle. It’s very adaptable, with a 360-degree rotation and tilt.
To attach the camera to the strap:
- Place camera in mount on strap.
- Use provided thumb screw to tighten camera onto mount.
To attach the strap to your hand:
- With the strap on your hand, adjust the strap on the thumb side first.
- These are velcro straps so all you have to do is pull and place to adjust the strap.
To attach the strap to your wrist:
- Take wrist strap and attach it by threading the strap through the rotating mount, hook side down.
- Place over your wrist and adjust your strap.
The wrist mount also comes equipped with an arm and leg strap. These can give you some different shots you wouldn’t ordinarily get.
To attach the strap to your arm or leg:
- Thread the arm and leg strap through the rotating mount.
- Wrap around your arm or leg and pull both straps until it tightens.
- Use the velcro to stabilize the straps.
The wrist strap is a versatile, hands-free way to take your favorite action shots.
To buy this type of mount click here.
8. Fishing Line Mount
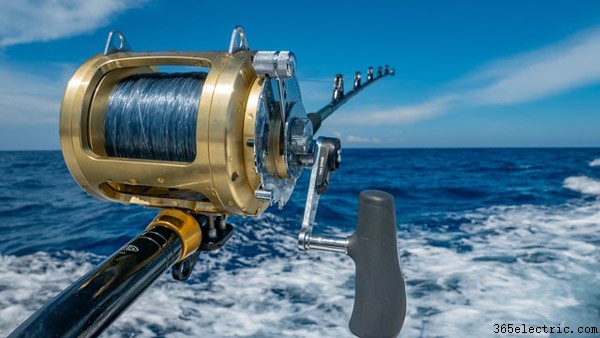
Want some cool underwater fishing video? We can help with that. For this, you will need some heavy-duty fishing line and a tool that allows you to string two action cameras together. One item you can use would be a Mule Mount and you can find those at the link below.
Use these DIY instructions to mount a camera to your fishing line:
- Take the floating back door off the action camera.
- Attach the camera to the mule mount using the thumb screws.
- Using the heavy-duty fishing line, run line through the Mule Mount.
- Put a weight on the other end of the line and Mule Mount.
- Add the fishing hook to the end of the line you ran through the Mule Mount.
- Go Fishing.
You’re going to want to be careful with this mount. Make sure everything is attached tightly. Do not go fishing in murky waters where you can’t see underwater. Do not go fishing where your line is liable to get tangled. With some consideration, you can take some great underwater video of fishing.
To buy this type of mount click here.
9. Dog Mount

Do you wonder what your dog does when you’re not around? Does your dog get out of your yard and you want to see where he/she goes? Mount an action camera on your dog and find out what your pets do when they’re away from you.
For this mount, you can use an adjustable wrist mount:
- Thread the dog’s collar through the adjustable wrist mount straps.
- Tighten securely.
- Put collar on dog with camera facing on side of head.
- Make sure camera is away from dog’s ears.
With this mount, you should be able to follow your furry friend anywhere.
To buy this type of mount click here.
There is another new option for this now, its an actual dog mount! If you have the money for another mount, you can find it here.
10. Sword Mount
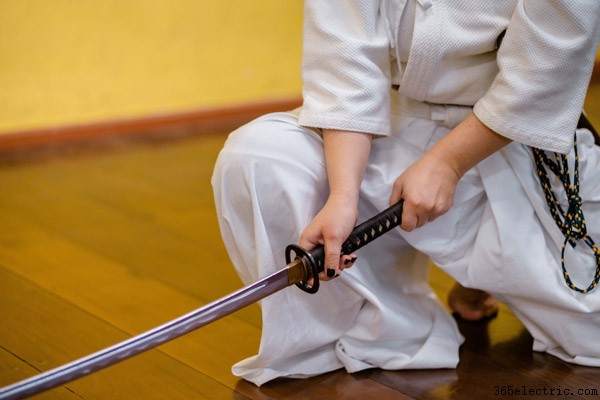
This is a really fun way to get some incredible footage or shots from the point of view of a sword. For this, you will need the wrist mount and an extender bar.
To attach the mount to the sword:
- Attach the camera to the extender bar.
- Attach the extender bar to the wrist mount.
- Using the wrist strap, wrap it around the hilt of the sword.
- Pull straps tightly to make sure the strap is secure.
- Fasten velcro.
This is for sword play, but you could feasibly use this on any type tool, such as:
- Axe
- Shovel
- Nerf Gun
- BB gun
- Bow
To buy this type of mount click here.
To get the extender bar click here.
Accessories You May Want
Your action camera probably came with only a couple of accessories. Standard action cameras usually only come with a mounting frame, buckle and a couple of mounts. You can absolutely use these for your camera in most situations. However, there are some other mounts on the market that can make your life easier:
Chest Strap Mount
Head Strap Mount
Handle Selfie Stick
Floating Hand Grip
Bike Handlebar Holder
Rotating Adjustable Wrist Mount
Removable Suction Cup Mount
Roll Bar Mount
You don’t necessarily have to have these different accessories, but it does make it easy to mount your action camera. We’ll go through these, so you know their use.
1.Chest Strap Mount

The chest strap mount is a harness strap belt that gives a steady recording at chest height. The belt is adjustable, and this is a one size fits most design. You can find this mount here.
2. Head Strap Mount
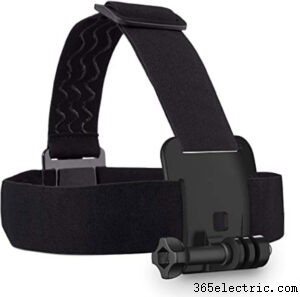
The head strap mount is a secure headband that wraps around your head for a steady shot or video. It keeps your camera in place and is good for sports like:
- Zip Lining
- Snorkeling
- Riding A Bike
Any sport where you need to use your hands would be acceptable for a head strap mount. You can find this mount here.
3. Handle Selfie Stick
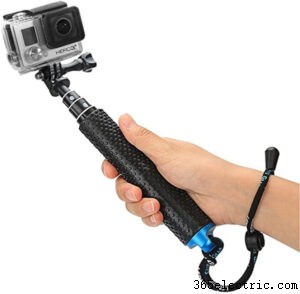
This stick is an extender pole that can extend up to 19 inches. It’s waterproof, so you could use it on a jet ski, and it works with all gopro mount cameras. You can find this mount here.
4. Floating Hand Grip
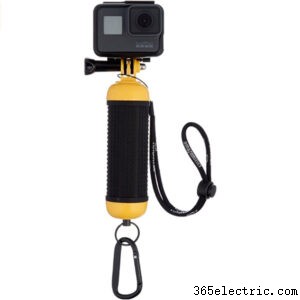
The floating hand grip is a great tool for underwater photography. Waterproof, it has a wrist strap design to keep the camera secure while you swim. You can find this mount here.
5. Bike Handlebar Holder
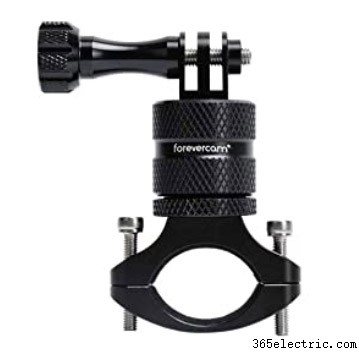
This nifty tool attaches to your bike’s handlebars. You place the camera on the mount and go for a ride. The camera does the rest. You can find this mount here.
6. Rotating Adjustable Wrist Mount
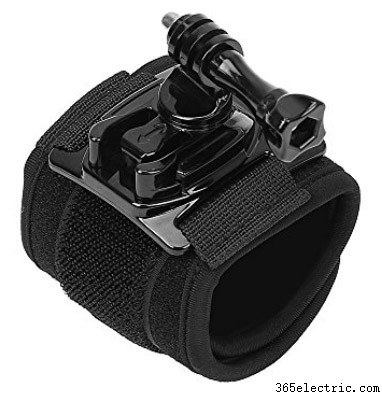
The wrist mount is a 360-degree rotating adjustable wrist mount. You can secure your camera flat against your wrist for easy convenience. It’s made for the wrist, but you can actually strap this to anything that will fit, including:
- Handlebars
- Arm
- Steering Wheel
You can find this mount here.
7. Removable Suction Cup Mount
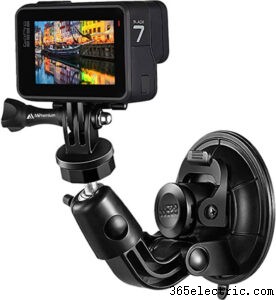
With the suction cup mount, you can put your camera virtually anywhere suction can take hold. This includes:
- Windshields
- Helmets
- Dashboards
It’s very convenient and easy to move. You can find this mount here.
8. Roll Bar Mount
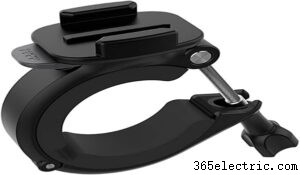
This mount fits around any bar from 1.4” to 2.5” so you can get some unusual perspective from your action video. It comes with full rotation for adjustability. Place it on a roll bar or any other bar to mount your camera in place. You can find it here.
Tips on Taking the Best Video
As much as we love our action camera, we don’t want video that is shaky or unwatchable. To combat that, we have some handy tips for using your action camera:
- Use a mount. This will stabilize the camera.
- Find a new angle. Don’t just go for the headshot. Strap your mount to your bumper, roll bar or anywhere else you can find for a new view.
- Don’t strap the camera to the top of the helmet. This will result in shaky video. Use the chin strap method instead.
- Use filters, like a red filter for underwater. This will help remove the blue-green colorcast underwater. Use neutral density filters in bright light. Experiment.
- Try out time-lapse shooting. Your action camera should have a time-lapse mode. This can create some unique shots to add to a video.
- Plan ahead. Think beforehand of what you want your video to look like and act accordingly.
We hope this handy guide on mounting an action camera was useful to you. For an article on shooting sports and fast action click the link.
Let us know in the comments if you have found any tricks for other types of mounts.
