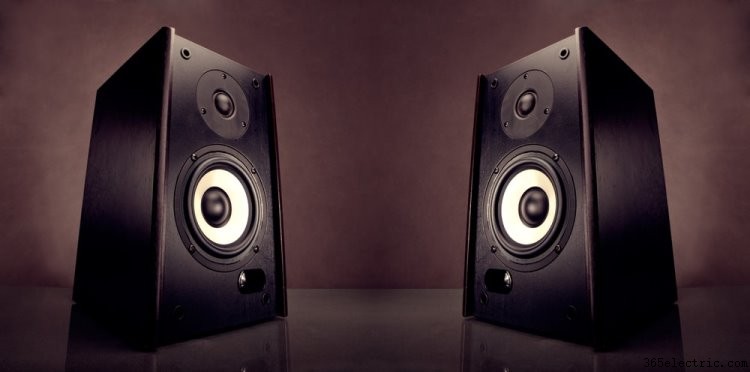
Как подключить динамики к 4 контактам
Благодаря современным технологиям динамики поставляются с несколькими разъемами, что позволяет отправлять аудиосигнал на отдельные драйверы, отдельные усилители или позволяет использовать их по старинке, просто отправляя полный аудиосигнал на все драйверы.
Каждый метод немного отличается; тем не менее, все они довольно просты, и эта статья объяснит вам все шаги и методы.
Также читайте:Как удлинить провода динамиков домашнего кинотеатра
Как подключить динамики к 4 контактам
Существует 3 способа подключения динамиков с 4 клеммами, и они следующие:-
- Оставить проводящую полосу между клеммами и подключить один набор проводов
- Двухпроводное соединение
- Би-ампинг

Процесс достаточно прост, и я проведу вас через него с помощью пошагового руководства. Я проведу вас через процесс выяснения того, какой провод вам нужен, учитывая сопротивление вашего динамика и необходимую длину кабеля. Вы можете обратить внимание на одну или две вещи, поскольку они могут повлиять на качество звука вашей системы.
Определение калибра и длины провода
Даже если у вас есть провод динамика, вам сначала нужно знать правильную длину и калибр провода, который вы должны использовать, в зависимости от импеданса вашего динамика.
Помните, что если вы используете слишком тонкий или слишком длинный провод, его сопротивление увеличится, что может привести к ухудшению качества звука.
В нашем рабочем примере предположим, что у нас есть два высококачественных громкоговорителя с импедансом 4 Ом, и они имеют двухпроводное соединение (4 клеммы).
Длина, которая нам понадобится с точки зрения длины провода, будет 15 футов. Таким образом, сверяясь с нашей таблицей, мы можем сказать, что, поскольку импеданс нашего динамика составляет 4 Ом, а расстояние составляет 15 футов, калибр провода, который нам нужен, - это провод 18 калибра. В нашем рабочем примере этот провод уже сделан из меди.
Зачистка провода динамика
Следующее, что нам нужно сделать, это зачистить оба конца провода динамика, чтобы мы могли поместить их в двухпроводные стойки и подключить к усилителю.
Помните, что в зависимости от вашей установки вы оставите проводящую шину прикрепленной к клеммам и подключите один набор проводов, или вы будете использовать метод двухпроводной разводки, при котором вы удаляете шину и используете два набора проводов (по одному для каждого драйвера). В противном случае вы можете использовать метод Bi-amping и подключить терминалы к отдельным усилителям.
Если вы еще этого не сделали, я бы посоветовал приобрести профессиональный обжимной инструмент, чтобы вы могли правильно зачистить провод. Они очень дешевые и хорошо выполняют свою работу.
Нет ничего хуже, чем попытаться снять изоляцию провода, и вы либо порвете часть внутреннего провода, либо испортите часть провода. У профессионального обжимного инструмента даже есть секции, которые позволяют зачищать провода различного сечения.
Подключите один конец провода динамика к усилителю
The next thing you have to do is connect one of the ends of all your speaker wires to your amplifier. Depending on your amplifier, it will also have spring clip terminals, binding posts, or bi-wiring posts (in our example, our amplifier has bi-wiring posts, and we are using the Bi-wiring method).
The posts will be color-coded, and so will the speaker wire, undoubtedly. Remove the bridge plates or pins between the binding posts and connect the two sets of speaker wires to the amplifier (making sure to note the bass posts and the treble posts). Also, note which way you have connected up the wire in terms of polarity. Tighten the posts.
Connect the other end of the speaker wire to your speakers
The same method will apply here. Remove the bridge plates or pins from the bi-wiring posts and then insert the wire for each (making sure to check that the correct wires are running to the bass and treble posts and that the polarities of the wires are correct). Tighten the posts.
The method may seem a bit lackluster; however, many people use incorrect wire gauge and length because they do not know what impedance level their speakers are sitting at, causing audio degradation. They then think it has something to do with the actual wiring setup that they have done.
Furthermore, one tends to get lazy and not pay attention to where the wires go because it seems easy enough, switching the wires’ polarity and connecting them to the wrong posts.
Speakers (Loudspeaker) overview
A speaker (loudspeaker) is an electroacoustic transducer. This is a complicated name for saying that a speaker converts an electrical audio signal into sound waves.
The most popular speaker today is a dynamic speaker. This means that the speaker needs some sort of external amplification to strengthen the audio signal before it reaches the speaker.
The dynamic speaker works on the same premise as dynamic microphones, however, in reverse. An alternating electric current is sent to the speaker’s voice coil (this is a coil of wire which is suspended between a permanent magnetic field.
This causes the speaker coil to move back and forth, which in turn causes the speaker diaphragm to move back and forth, creating sound waves.
Speakers are typically housed in a cabinet, and the materials from which the cabinet is housed will play an essential role in its sound quality.
With regards to high fidelity sound reproduction, you will have multiple transducers (also termed speaker drivers) mounted in the same cabinet. These drivers (transducers) will function and reproduce different sections of the sound frequency range.
This is what most individuals now as tweeters, woofers, sub-woofers, and mid-range drivers. Each of these drivers will reproduce specific frequencies depending on how they are designed and structured.
Tweeters will reproduce high frequencies, mid-range drivers will reproduce mid-range frequencies, woofers will reproduce low frequencies, and subwoofers will produce extremely low frequencies.
As we will see in the subsequent sections, there are a few connection types that allow us to connect our electrical audio signal to our speakers via speaker wire.
However, we first need to consider that depending on the speaker’s system design; you will connect a wire that will run the entire audio frequency range or run multiple wires to divide the frequency range and send them to separate transducers (drivers). This is where two and four-post terminals for speakers come into play.
System design (crossover)
This type of design is how four-post terminals came into production. A multiple-driver speaker system will use an assembly of filters (crossover) to separate the input signal into different frequency ranges depending on what frequency range each driver is designed for.
Consequently, each driver will receive power only at their operating frequencies. This is great because it will reduce distortion and interference between the separate drivers ensuring higher audio fidelity.
There are two different types of crossovers, namely active and passive crossovers. Passive crossovers are where we see and use four-post terminals. Passive crossovers are electronic circuits that use a combination of one or more inductors, capacitors, and resistors.
All these components are combined in a specific way to form a filter network. They are placed between the amplifier and driver, and we connect to them via four-post terminals.
Active crossovers are filter circuits that divide the audio signal into separate frequency bands before amplification. With this method, you require one amplifier for each bandpass (an amplifier for tweeters and an amplifier for woofers, etc.).
Now that we understand how speakers work let us look at the various connection types you can use. Then we will be able to comprehend with our working example how to connect speaker wire to terminals, and in our example, we will use four-post terminals.
What connection type of connections do speakers have?
Loudspeakers use terminals or posts for a connection method. However, depending on the speaker and what purpose it is designed for, it may and probably will have other connection types, which we will discuss later.
Spring clip terminals
These types of terminals are found on older and entry-level speakers. The wires are held in place by a spring-loaded clip. They are also usually color-coded in black and red to distinguish between the positive and negative terminals.
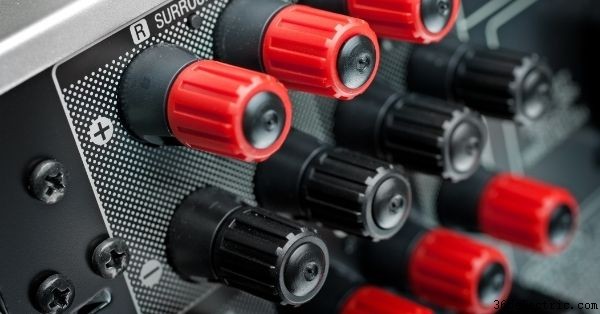
Binding posts
A binding post will consist of a post with a binding cap. Once the cap is removed, you will be able to see a hole running through the center from one side to the other.
These posts are also usually color-coded in red and black for easy identification of polarities. These types of posts can be gold plated and come equipped with high-end top quality loudspeakers.
Bi-wiring posts (4 terminals)
These types of posts will be similar to that of binding posts. One variation may be that you need to push the wire down the center of the post instead of through the side of it.
Bi-wire posts have two sets of posts, and this allows the amplifier to connect two separate sets of speaker wire to it. One set of wire is used to drive the low-frequency driver, while the other set is used to drive the high-range frequency drivers. This creates an improved bass response and treble smoothness.
These posts will have a conductive bar that links the two terminals together, so you only need one cable to connect both drivers to your amplifier if you wish to do so. This is your standard setup where both drivers receive the same audio signal.
Bi-wiring setup
This is where you remove the conductive bar and have separate wires for each terminal going to one amplifier. This allows for the separation of frequencies using the crossover method, as we discussed.
Bi-amping setup
This is where the conductive bar is removed, and each terminal is connected with separate wires, and each wire goes to separate amplifiers.
Banana plugs
Banana plugs are a type of fitting that you can purchase and connect your speaker wire to. These fitting are not equipped with loudspeakers or posts.
They are commonly used in situations where you would like things to be very user-friendly or because you continuously move your loudspeakers around (which you should not do).
What other types of connections for speakers do you get?
Depending on the speaker design and what it is used for, you can get a variety of different connections ranging from 1/4inch jack connections, XLR connections, RCA connections, and SpeakON connections.
These speakers will usually be in the form of studio monitors, studio speakers, PA speakers, and stage monitors.
Granted, you are able to use these types of speakers in your home theatre setup; however, they are all designed to perform slightly different functions. Furthermore, if you have these speakers with these types of connections, you have to make sure that your amplifier supports these connections.
Otherwise, you will have to either try and build the speaker cable yourself (which will require some knowledge and a fair amount of time and soldering). You will have to purchase audio adapters that will allow you to convert one type of connection to another.
One thing to note is that in today’s digital world, you also get digital connection types in the form of S/PDIF cables. All the connection types discussed besides S/PDIF are analog connection types, and you should be able to find a converter for one kind to another pretty easily.
For amplifiers with a S/PDIF connection, you will have to get a digital to analog converter, and those are also readily available.
Are those connections types better than speaker wire?
The connection types are different and used for various applications. ¼inch jack connections tend to have a lot of interference, especially when the cable’s length is long. XLR connections are balanced connections and are great for applications within a recording studio. SpeakON cables are used for large PA systems that see a lot of wear and tear.
For the most part, your standard speaker wire and connection that comes with your home audio equipment is more than adequate in handling and performing at a high quality, and there will be no need to look for converters and devices that will change the type of connection because it will be unnecessary.
Заключение
It is always better to have an understanding of something when trying to figure out how to work out a problem. With this in mind, we learned about loudspeakers and how they work. We also learned about how each driver functions depending on its design.
Due to the fact that we now four-post terminals use a cross over design, we know that each wire that we connect to the speaker is powering a different driver. Hence we learn to associate the correct wire from the amplifier to the valid driver.
Suppose we did not know and understand this, and this article just gave you a step-by-step guide on how to strip the wire and connect them to your amplifier and speakers. In that case, you may have run into some trouble areas where the amplifier or speakers did not function correctly.
We also learned that speakers could have other types of terminals, and even some speakers are built with different connection types.
These types of speakers are made and designed for other functions (still with the ability to play music in mind) from the standpoint of recording studios and PA systems.
All in all, you should have a comprehensive understanding of how speakers work and how to connect them to an amplifier using four post terminals now.