Замена привода двери Honda Accord 2008–2012 годов
В этой статье: Мы расскажем вам, как заменить неисправный дверной привод на Honda Accord 2008–2012 годов.
- Необходимые инструменты
- Необходимые детали
- Шаг 1. Снятие дверной панели
- Шаг 2. Извлечение привода сломанной двери
- Шаг 3. Подготовка нового дверного привода
- Шаг 4. Повторная установка привода и дверной панели
Сложность проекта:легкий
Расчетное время:1,5 часа (или меньше)
Привод двери со стороны водителя на моей Honda Accord 2009 года начал шуметь около 6 месяцев назад при закрывании и отпирании. Особенно это было заметно, когда двери закрывались и машина начинала катиться в драйве — автоматическая блокировка. Звучало немного похоже на стон (из-за отсутствия лучшего термина).
Наконец, около двух недель назад он перестал реагировать на блокировку и разблокировку с перерывами. Я заметил, что каждый раз, когда я трогался со стоп-сигнала, он пытался заблокироваться — стоп-сигнал за стоп-сигналом. Я понял, что дверь со стороны водителя не запиралась и что функция автоматического запирания просто пыталась заблокировать ее каждый раз, когда машина начинала катиться. Это была моя очередь на замену.
В этой статье я расскажу вам, как снять дверную панель и заменить дверной привод Honda. На самом деле это довольно просто. Помните:в целях безопасности не забывайте отключать отрицательный полюс аккумулятора вашего автомобиля перед любыми работами с электричеством, чтобы предотвратить перегорание предохранителей или повреждение автомобиля!
Необходимые детали
Там действительно только одна часть (или две, если вы делаете две двери):
- Привод со стороны водителя для Honda Accord 2008–2012 гг. — 37 долл. США
- Привод со стороны пассажира для Honda Accord 2008-2012 гг. — 32 доллара США.
Необходимые инструменты
Этот проект был довольно прямолинейным и простым и требовал всего несколько инструментов:
- крестовая отвертка
- Плоская отвертка
- Гаечный ключ или головка на 10 мм с трещоткой
- Пластиковый инструмент
- Суперклей
- Клейкая лента
Шаг 1. Снятие дверной панели
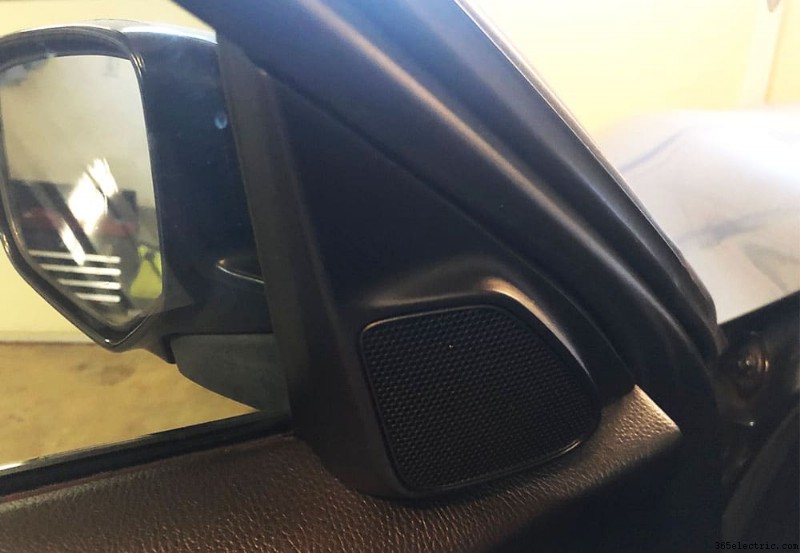
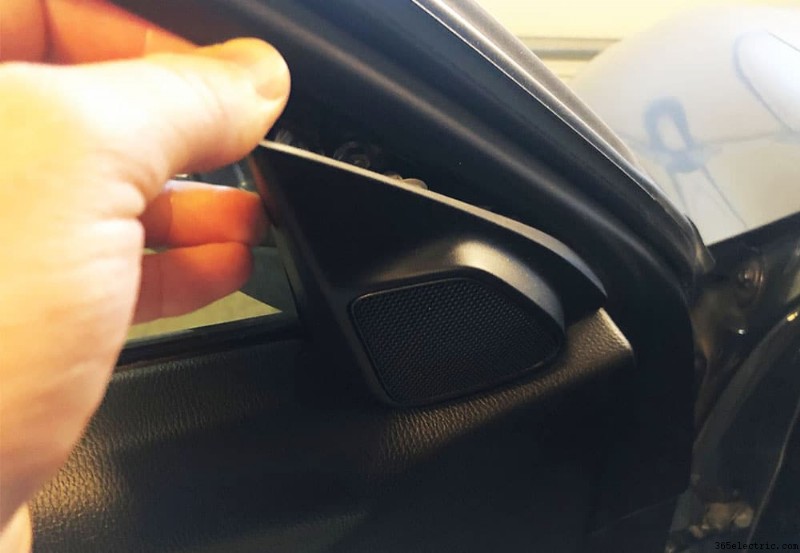
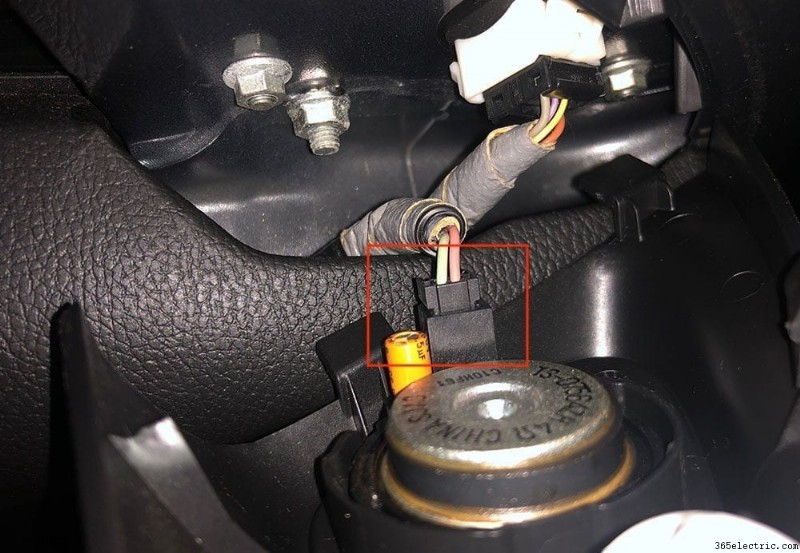
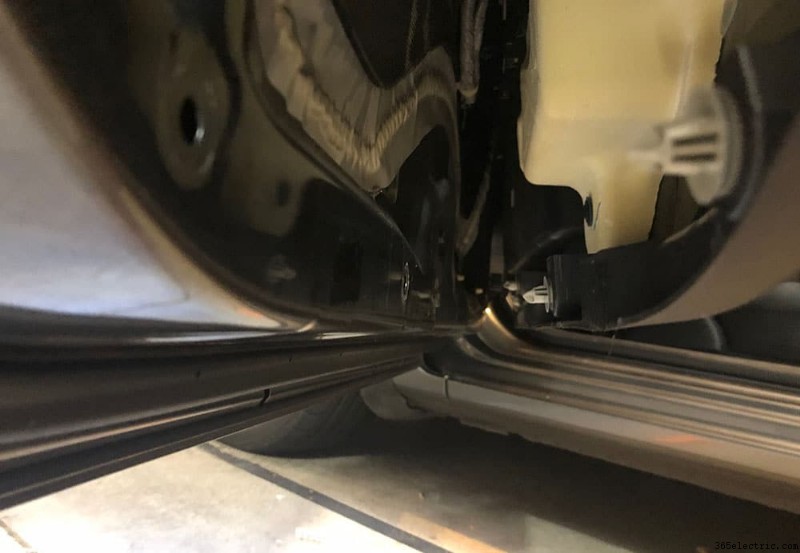
Первое, что вам нужно сделать, это открутить винты дверной панели, отсоединить и снять дверные панели вашего Accord. Для этого начните с твитера на верхней стороне двери. Поместите пальцы между окном и панелью твитера и осторожно потяните. За ним есть один клип, так что он будет отстегиваться относительно легко. После отсоединения отсоедините один штекер твитера и отложите твитер в сторону.
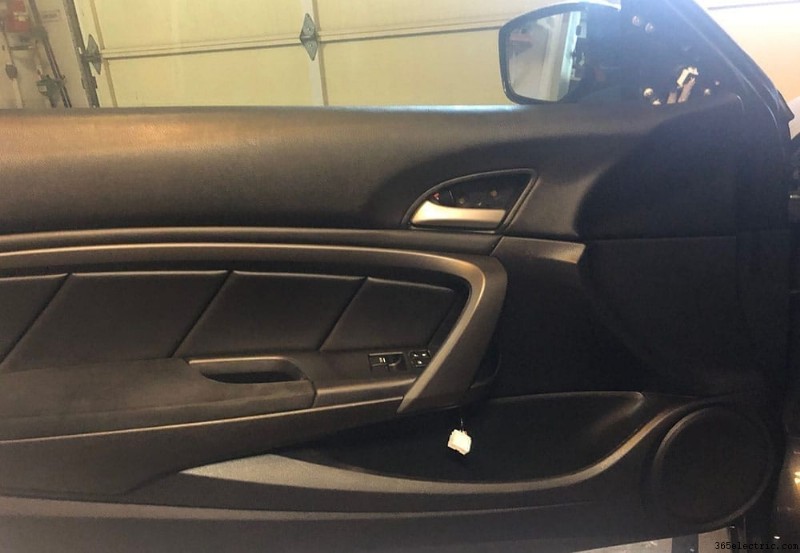
Сняв твитер, подойдите к дверной ручке. За ручкой двери находится декоративная накладка, закрывающая три винта. В верхней части пластиковой крышки вы заметите небольшой зажим. Используйте маленькую плоскую отвертку, чтобы вдавить зажим и снять панель, чтобы открыть три дверных винта. Отвинтите все три винта и отложите их в сторону, чтобы установить дверцу на место.
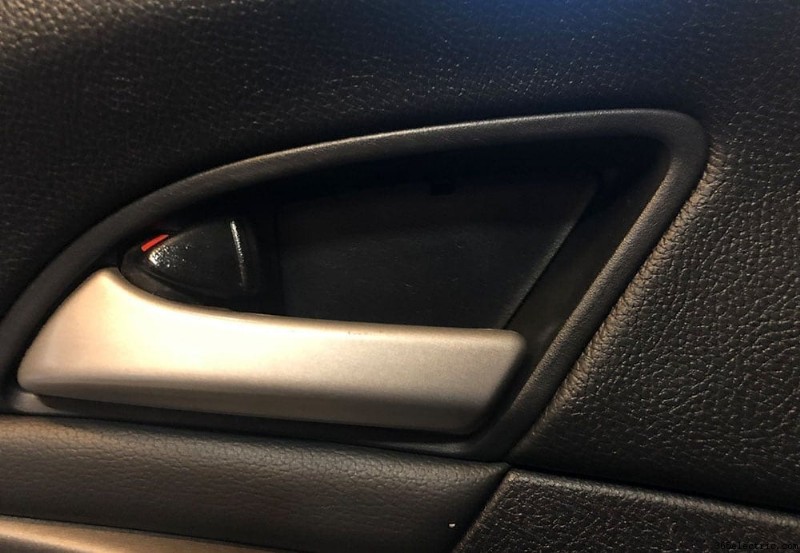
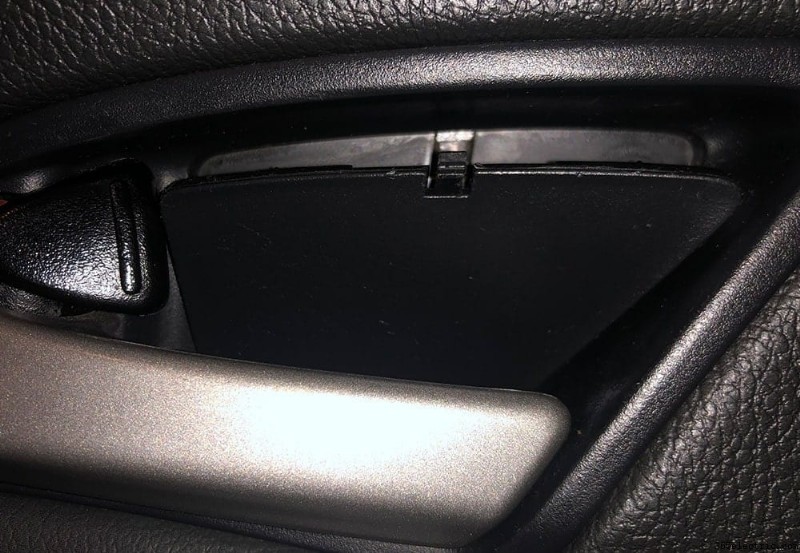
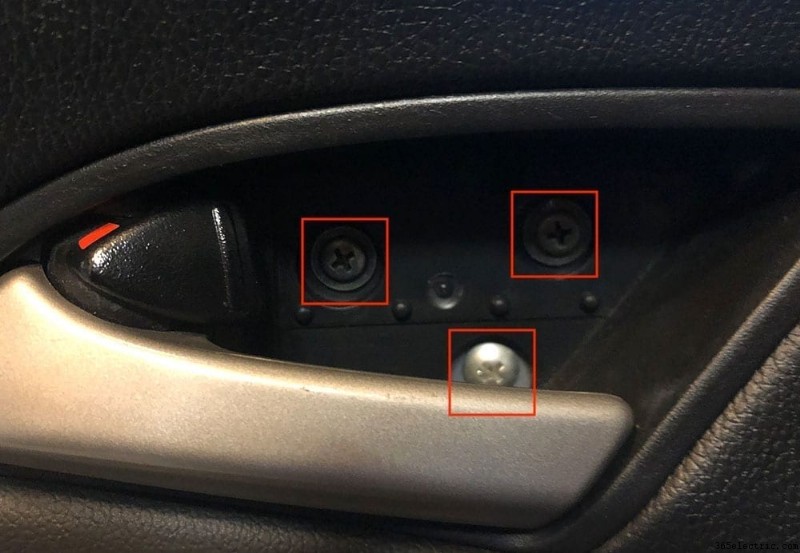
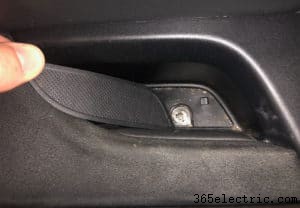
На дверном подлокотнике и ручке есть еще один винт, который нужно открутить. Винт находится под резиноподобной крышкой, расположенной в нижней части дверной ручки. Используйте плоскую головку, чтобы вклиниться между углами и поднимите крышку, чтобы получить доступ к винту под ней. Затем отвинтите этот единственный винт панели двери.
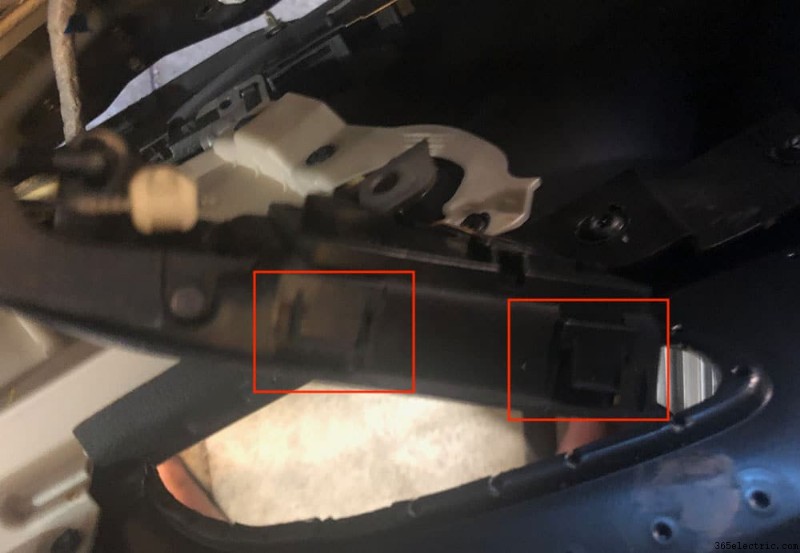
Последний винт, который вам нужно выкрутить, находится за панелью на нижней стороне дверной ручки. С помощью клина подденьте панель вниз, чтобы снять и получить доступ к винту за ней. Открутите последний винт и отложите в сторону. Затем отсоедините белые и серые заглушки от дверной панели и вставьте их за панель в дверь. Это позволит вашей двери свободно двигаться, когда вы вытаскиваете панель из двери.
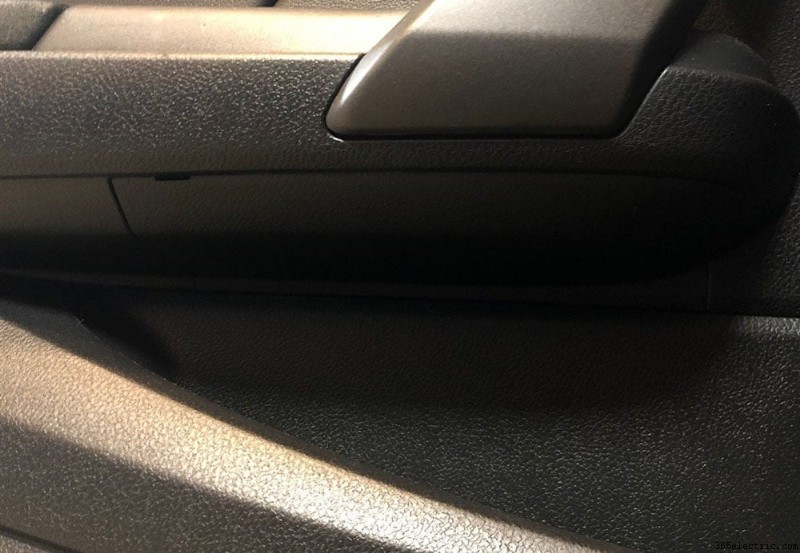
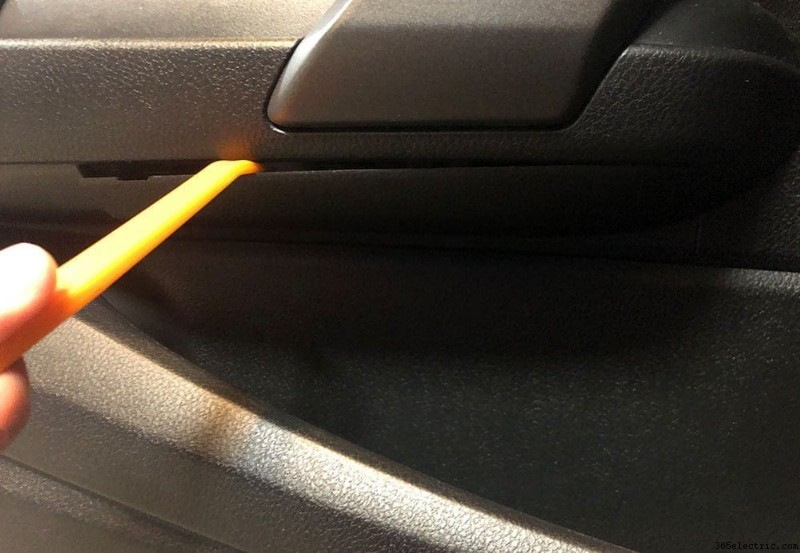
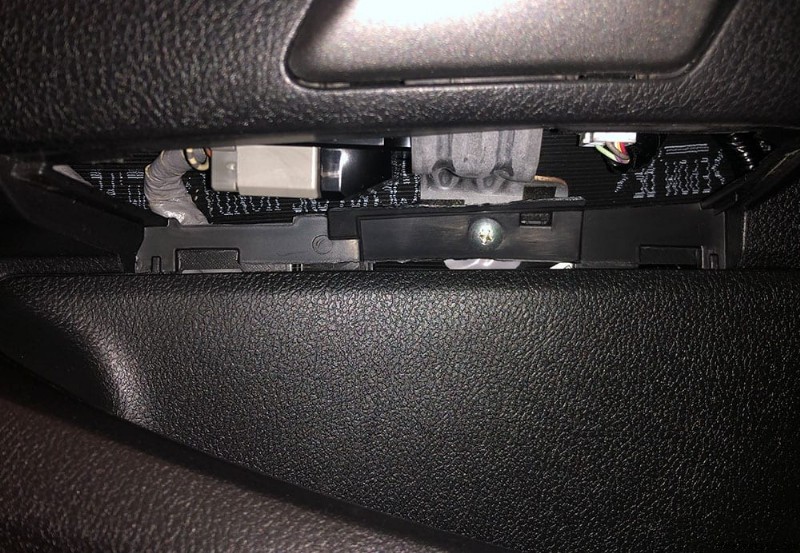
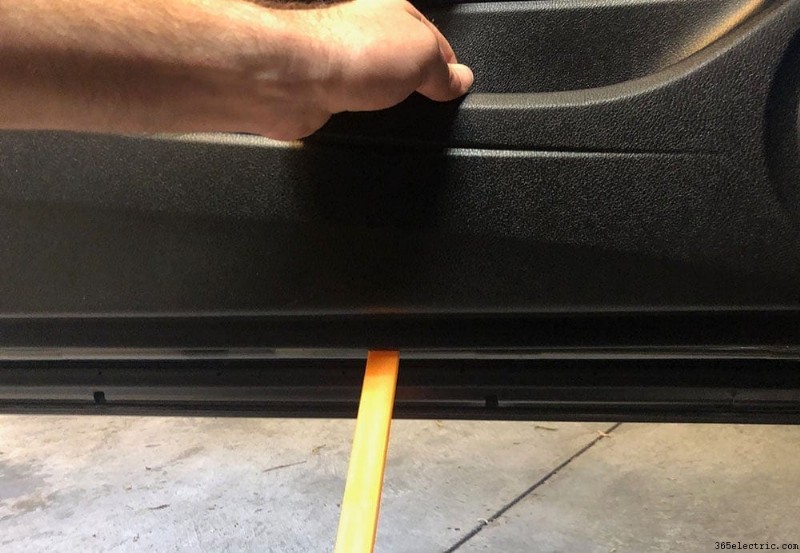
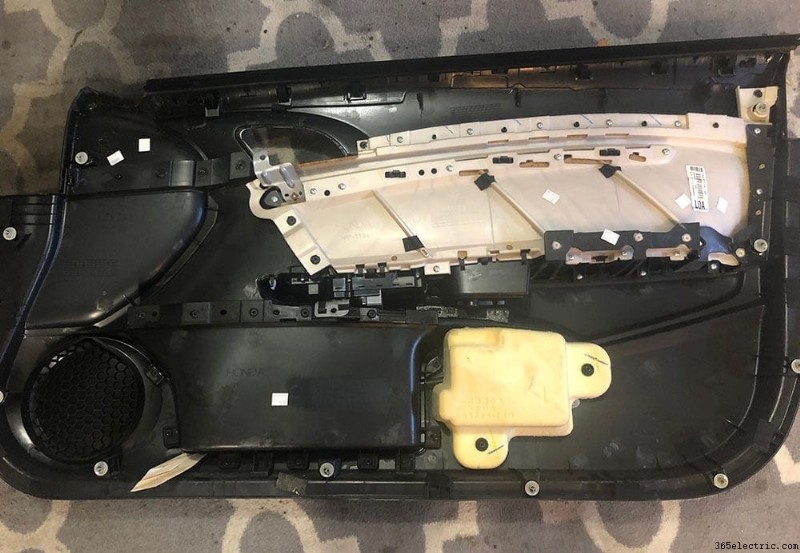
Сняв все винты, твитер и заглушки переключателя, вы готовы освободить панель и снять ее с двери. Для этого вставьте большой инструмент в нижнюю часть панели. If you don't have a pry tool large enough there's actually a space that your fingers will fit in along the bottom side of the panel.
Pulling from the very bottom side of the panel and from the cubby area, pull the door panel outwards away from the door to unclip all of the bottom door clips. Typically this will be a loud and abrupt ‘POP' and the bottom side of the panel will break free. There are clips along side the entire bottom of the panel and one or two on the side.
Once all of the clips are free, lift upwards on your door panel to remove it. Once it's lifted away from the door the last piece you'll need to pull free from the panel is the handle. There's a few plastic clips on the back side of the handle that you'll just need to lift upwards to break the handle free and detach it from the door panel.
Place it on a rug or towel to prevent any scratching of the surface.
Step 2:Removing Your Broken Door Actuator
With your door panel removed, you now will be able to gain access to the back side of the door and ultimately the actuator. To begin, you'll need to get behind the damping material that covers the opening of the door panel so that you can reach and access the cable and actuator rod. You can do this by running a razor blade along the adhesive that holds the damping material to the door and peel the material back a foot or two – enough to reach the actuator. In my case I cut a sizable slit in the center to try to limit the damage to the damping.
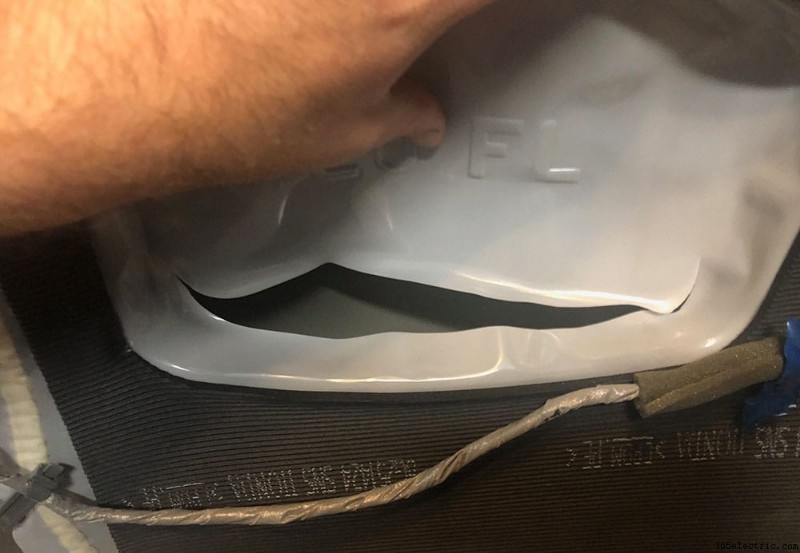
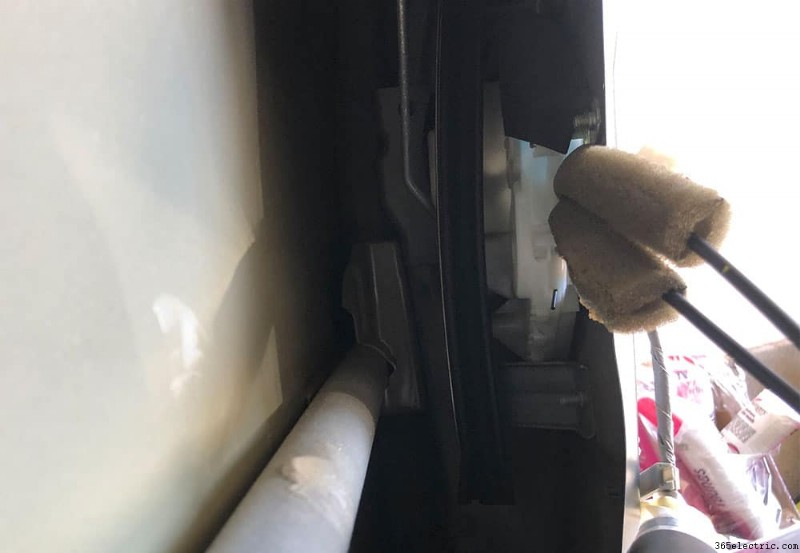
Next, you'll need to unclip the door latch cable that runs along the door and into the back side of the actuator. Once unclipped you can either feed the cables and latch through the damping material or you can leave it hanging for now until you remove the actuator.
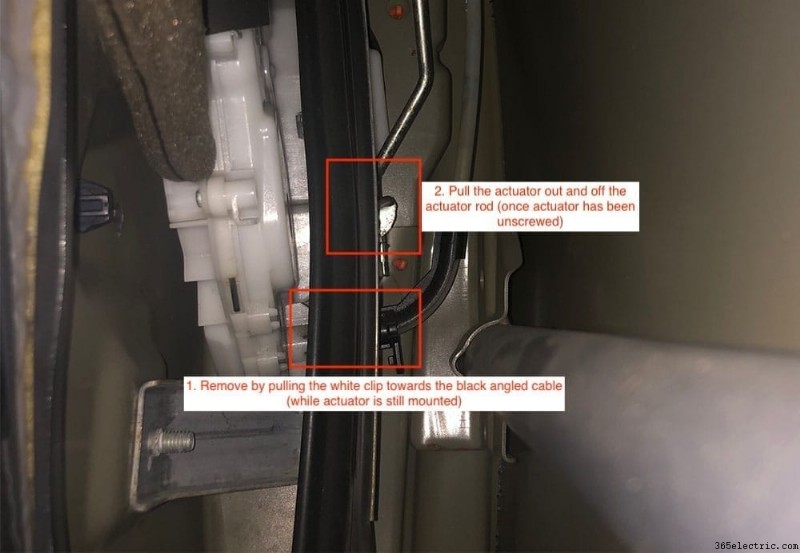
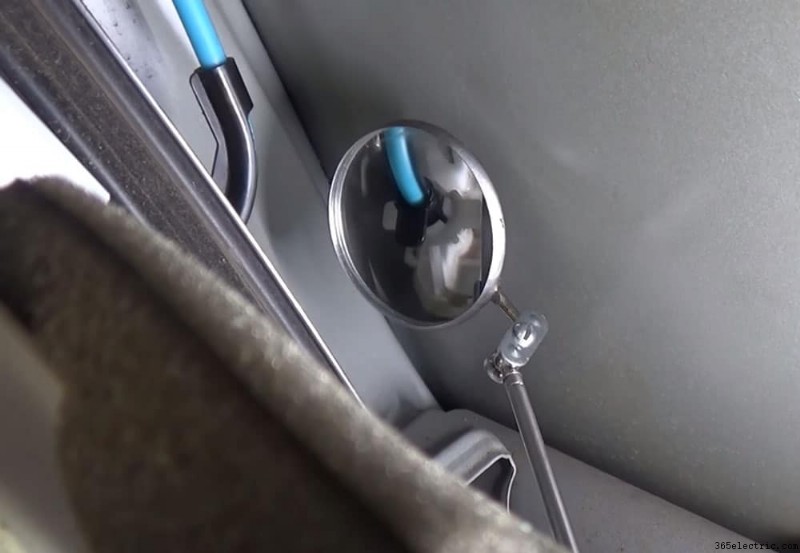
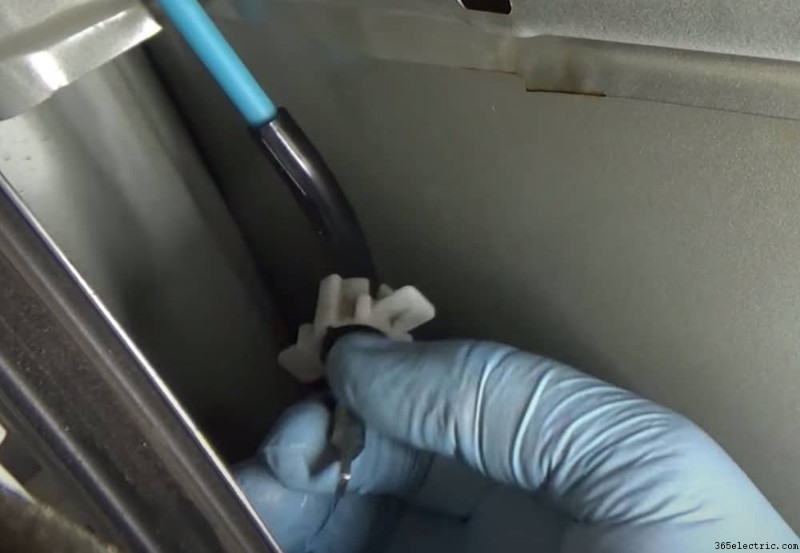
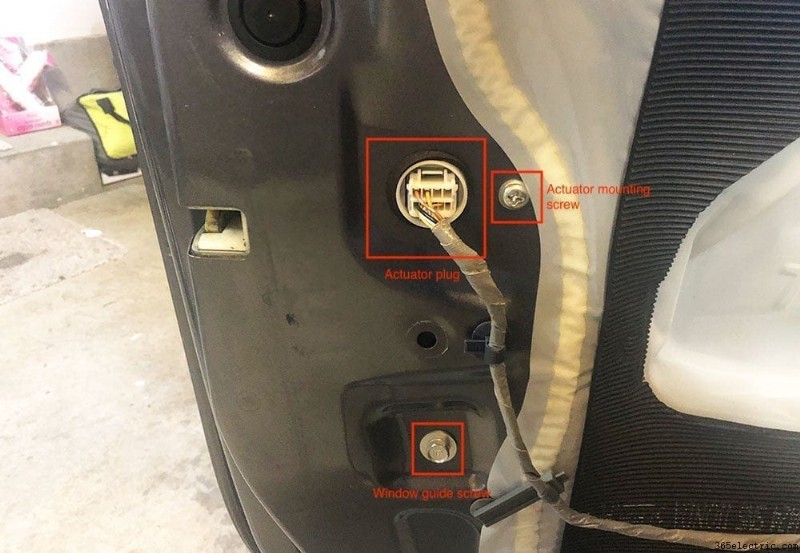
Using the slit in the damping to access the actuator, for those who are replacing the driver side actuator you'll need to remove a single cable that feeds directly into the back side of the actuator (*note this single cable that goes to the back-side of the actuator is only located on the driver side door actuator) . To do this, you need to grasp the white clip that surrounds the black cable housing and pull it away from the actuator to get it to unclip. Once it's unclipped you can remove the cable from the actuator itself (see images). Finally, pull out the plug that powers the actuator.
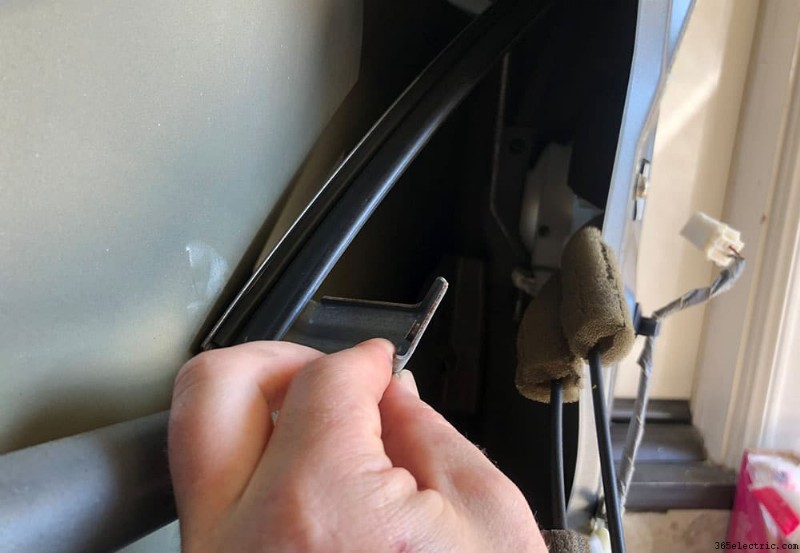
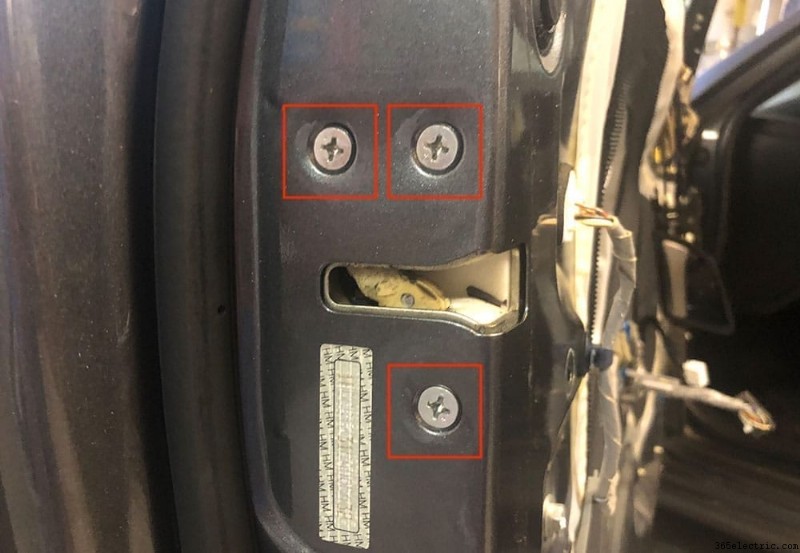
With the cables unhooked from the door and the single cable removed from the back side of the actuator you're ready to unmount the actuator from the door. There are a total of 4 phillips screws that hold the actuator to the door. Remove all 4 screws along with the 10mm bolt that holds the window guide behind the door. This will allow you to pull the actuator from behind the door a little easier with the window guide pushed aside.
Start to pull the actuator from the door, working the remaining rod out. Once the rod is removed you can pull actuator out completely and begin the process of preparing your new actuator.
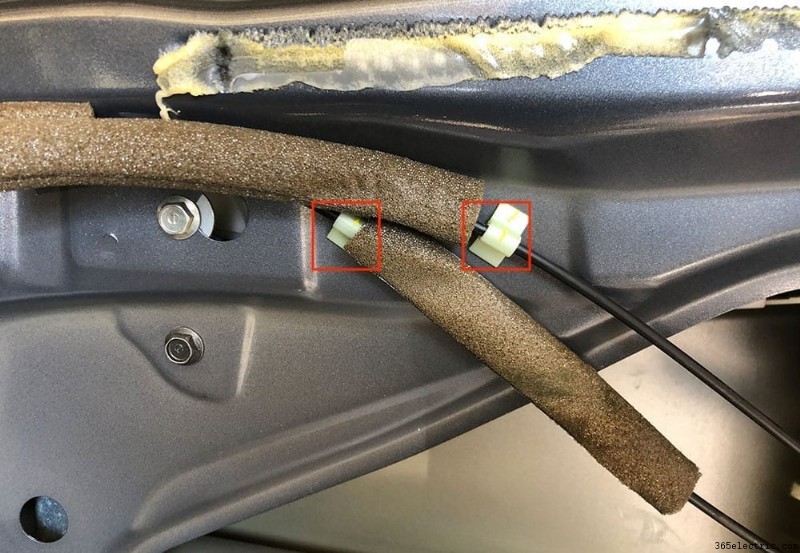
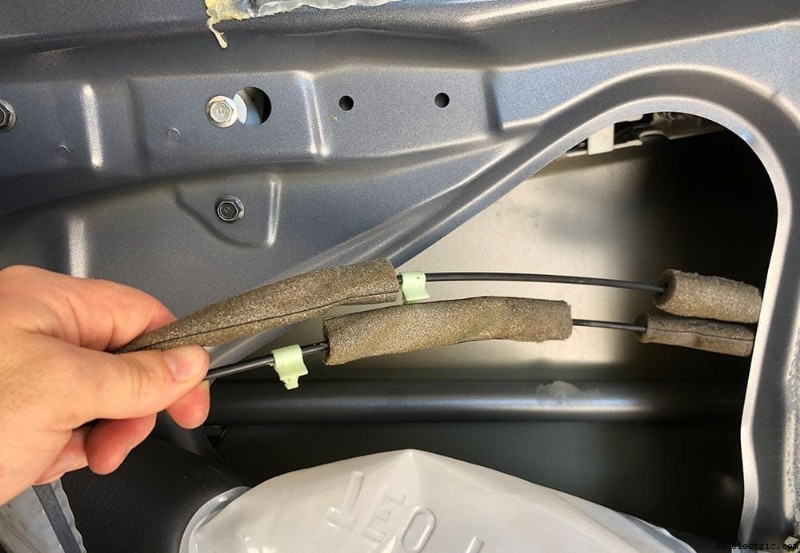
Step 3:Prepping Your New Door Actuator
There's a couple things you'll need to do to prepare your new door actuator for installation. First, the door handle cables that run to the interior door handle will need to be pulled from the old actuator and installed on the new one. There's a panel that covers the cables with a single phillips screw holding the cover in place. Unscrew the panel to gain access to the two cables.
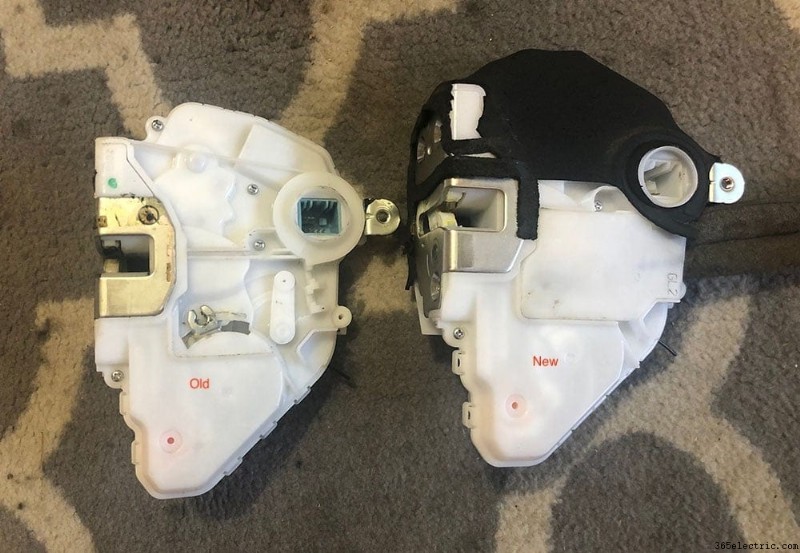
Remove the two cables from the old actuator and then place it onto the new one along with the cable cover, screwing it back into place.
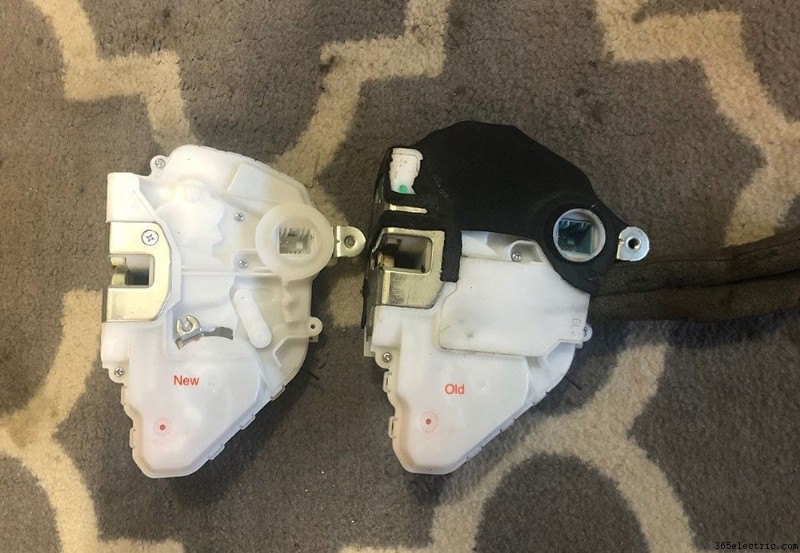
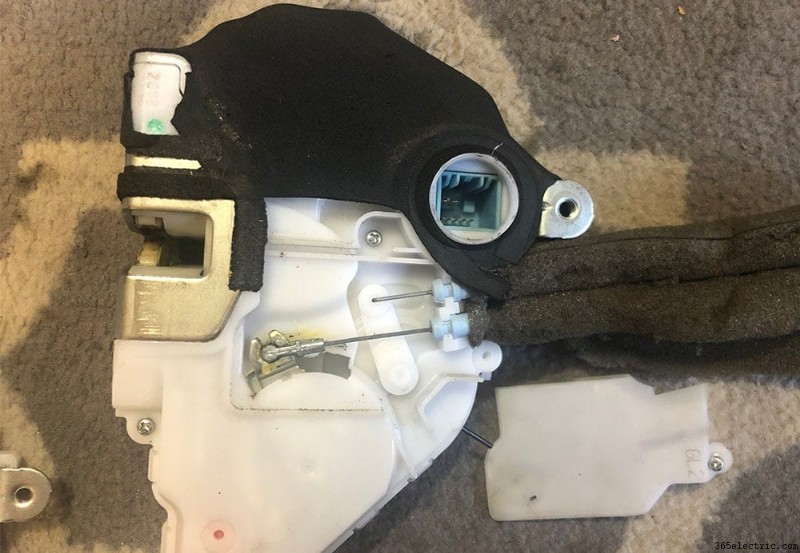
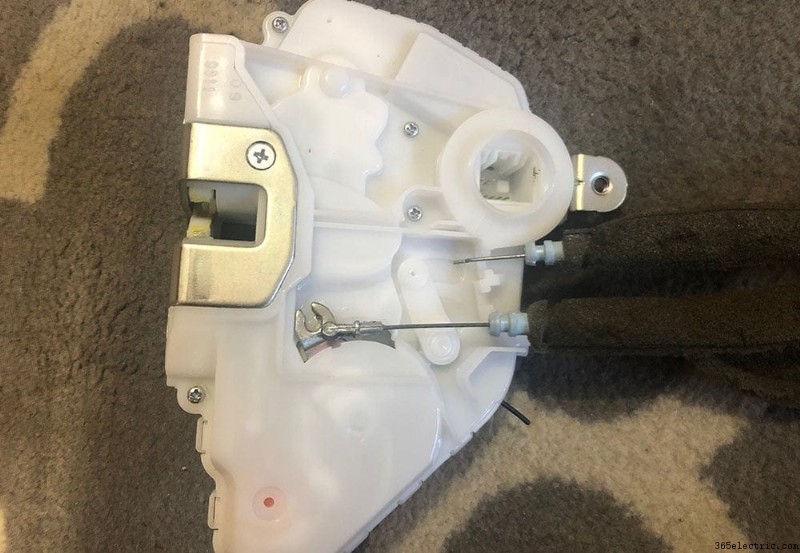
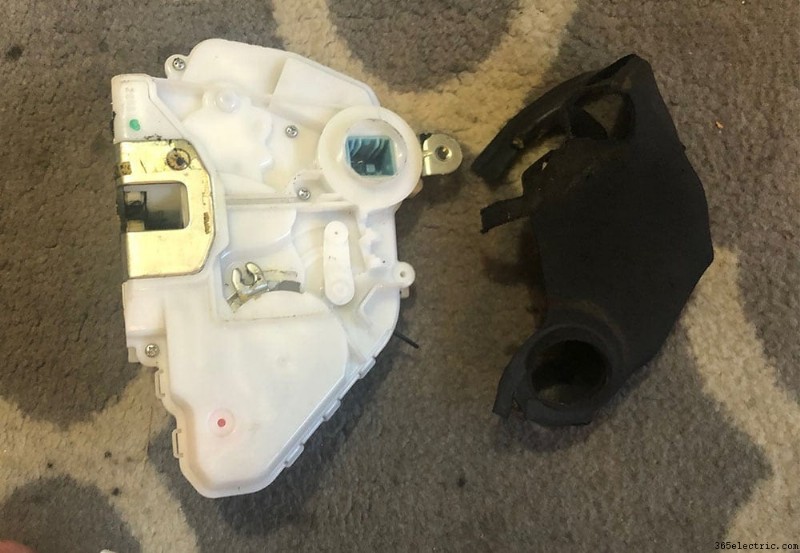
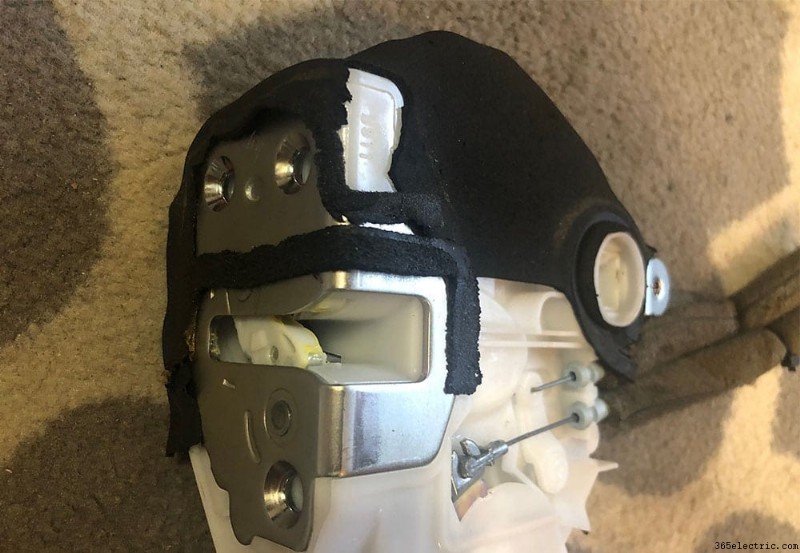
Once the cables are in place on the new actuator, the only thing left to do is to remove the old padding that's on the old actuator and place it onto the new one. Unfortunately, the new actuator doesn't come with the padding so it'll need to be reused from the old, broken unit.
I used a razor blade to separate the padding from the actuator with minimal damage and then used a few dabs of super glue to fuse it to the new one. For the most part, the padding is placed between the door and the actuator so naturally when it's mounted it'll stay in place.
Step 4:Re-installing Your Actuator and Door Panel
The rest of the process is pretty simple. Re-install your actuator, feeding the actuator rod back into the actuator and then mounting it to the door. Plug the actuator plug back in, then insert and re-clip the single cable back into the backside of the actuator.
After the actuator is mounted and the cables are in place, be sure to re-install your window guide and screw it in, along with clipping back the door handle cables to the door.
At this point, you're ready to test your new actuator. Close your door (note that you should ensure the door is unlocked before you close it), and then use your remove to lock and unlock to ensure your new actuator is working properly.
As for the slit that you cut (if you cut one) into the damping, I used some heavy duty duct tape to seal it back up. With the damping fixed you can re-install the door panel, ensuring that the window and door lock buttons are plugged back in. Re-install your tweeter, and you're done!
Hope you enjoyed the how-to, please feel free to leave us a note or ask questions in the comments below!


